Introduction to Egg Incubation
Egg incubation is a fascinating and rewarding process that requires attention to detail and patience. Whether you're a hobbyist, a small-scale farmer, or someone interested in hatching eggs for educational purposes, understanding the basics of incubation is crucial. This guide will walk you through the top 10 tips for successful egg incubation, covering everything from selecting the right incubator to managing humidity levels.

Choosing the Right Incubator
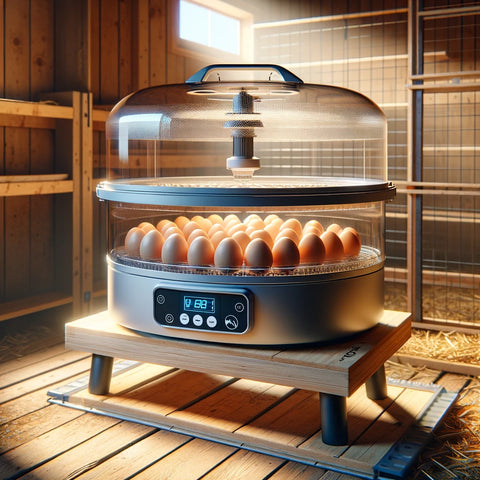
Selecting the right incubator is the first step toward successful egg incubation. Consider factors like capacity, automatic turning features, and temperature control. Visit GrubTerra for recommendations on high-quality incubators.
Setting Up Your Incubator
A proper setup is crucial. Place your incubator in an area free from direct sunlight and drafts to maintain a consistent environment. Ensure you have a reliable hygrometer and thermometer to monitor conditions inside.
Egg Selection and Care
Not all eggs are suitable for incubation. Choose eggs that are fresh, clean, and free from defects. Handle them with care and store them properly before incubation to increase your chances of a successful hatch.

Optimizing Temperature for Incubation
Temperature consistency is key. Most eggs require a temperature around 99.5°F (37.5°C) for optimal development. Small fluctuations can impact the development of the embryos, so it's important to monitor and adjust the temperature as needed.
Managing Humidity Levels
Humidity plays a critical role in the incubation process. Too high or too low humidity can result in poor hatch rates. Aim for 45-55% humidity during incubation and increase it to 65-75% during the final days before hatching.
Ventilation and Egg Turning
Proper ventilation is necessary to provide fresh air and remove excess moisture. Turning eggs is also essential to prevent the embryo from sticking to the shell. Consider an incubator with an automatic turning feature to simplify this process.
Monitoring and Adjusting Conditions
Regularly check the temperature, humidity, and egg position. Adjust the incubator settings based on the development stage of the embryos and record your observations to help refine your incubation process.
The Hatching Process
As hatching day approaches, prepare for the arrival of your chicks. Reduce egg turning and increase humidity. Understand when and how to assist with hatching, if necessary, and how to care for the newly hatched chicks.
Cleaning and Maintenance
After each hatch, thoroughly clean and disinfect your incubator to prevent the spread of disease and ensure it's ready for the next batch of eggs.
Common Challenges and Solutions
Learn how to identify and address common incubation challenges, such as temperature spikes or drops, incorrect humidity levels, and unhatched eggs.
Advanced Techniques and Tips
With experience, you may wish to experiment with different incubation techniques or try hatching eggs from more challenging species. Sharing experiences and tips with the community can be invaluable.
Success Stories and Testimonials
Hearing about the success stories of others can be incredibly motivating. Learn how these tips have led to successful hatches and happy outcomes.

FAQs on Egg Incubation
How long does egg incubation take?
The incubation period varies by species. Chicken eggs typically hatch in about 21 days, duck eggs in 28 days, and quail eggs in 17-18 days. It's important to research the specific requirements of the eggs you're incubating to ensure you're providing the right conditions throughout their development.
Can I incubate eggs from different species at the same time?
Incubating eggs from different species at the same time is possible, but it requires careful planning. Each species has specific temperature and humidity needs, as well as different incubation periods. If the requirements are similar, you can incubate them together, but you'll need to make adjustments based on the species that requires the most precise conditions.
How often should I turn the eggs?
Eggs should be turned at least three to five times a day to prevent the embryo from sticking to the shell and to promote healthy development. Automatic egg turners can make this process easier, but if you're turning eggs manually, it's crucial to be consistent and gentle.
What should I do if an egg doesn't hatch?
If an egg doesn't hatch, it's important to investigate potential causes. After the expected hatch date, give the eggs an additional day or two, as some may hatch late. If they still don't hatch, carefully inspect the egg. Lack of development could be due to infertility, improper incubation conditions, or genetic issues. Use this as a learning experience to adjust future incubation practices.
How can I ensure the highest hatch rate?
Ensuring a high hatch rate involves several factors: starting with healthy, fertile eggs, maintaining optimal incubation conditions (temperature, humidity, ventilation, and turning), and minimizing disturbances. Regular monitoring and adjustments based on the development stage of the embryos are also crucial. Experience and attention to detail will improve your success rate over time.
What's the best way to store eggs before incubation?
Eggs should be stored in a cool, humid place with temperatures around 55°F (13°C) and 75% humidity. Position them with the pointed end down and turn them once a day to keep the yolk centered. Store eggs for no longer than 7 days before starting incubation to maximize viability.
Conclusion and Next Steps
Successful egg incubation requires attention to detail, patience, and a willingness to learn from each experience. By following these top 10 tips, you're well on your way to a rewarding incubation journey. For more detailed guides and resources, check out GrubTerra's blog.
Remember, each incubation experience is an opportunity to learn and improve. Happy hatching!


